
Last Easter, Olivia walked in with a wooden board scattered with pastel candies and chocolate eggs arranged like it belonged in a magazine. Everyone stopped mid-conversation and gathered around it. That’s when I realized—an easter candy charcuterie board beats a traditional basket by a mile. I’ve been making them ever since, and honestly, it’s become my favorite way to entertain during spring.
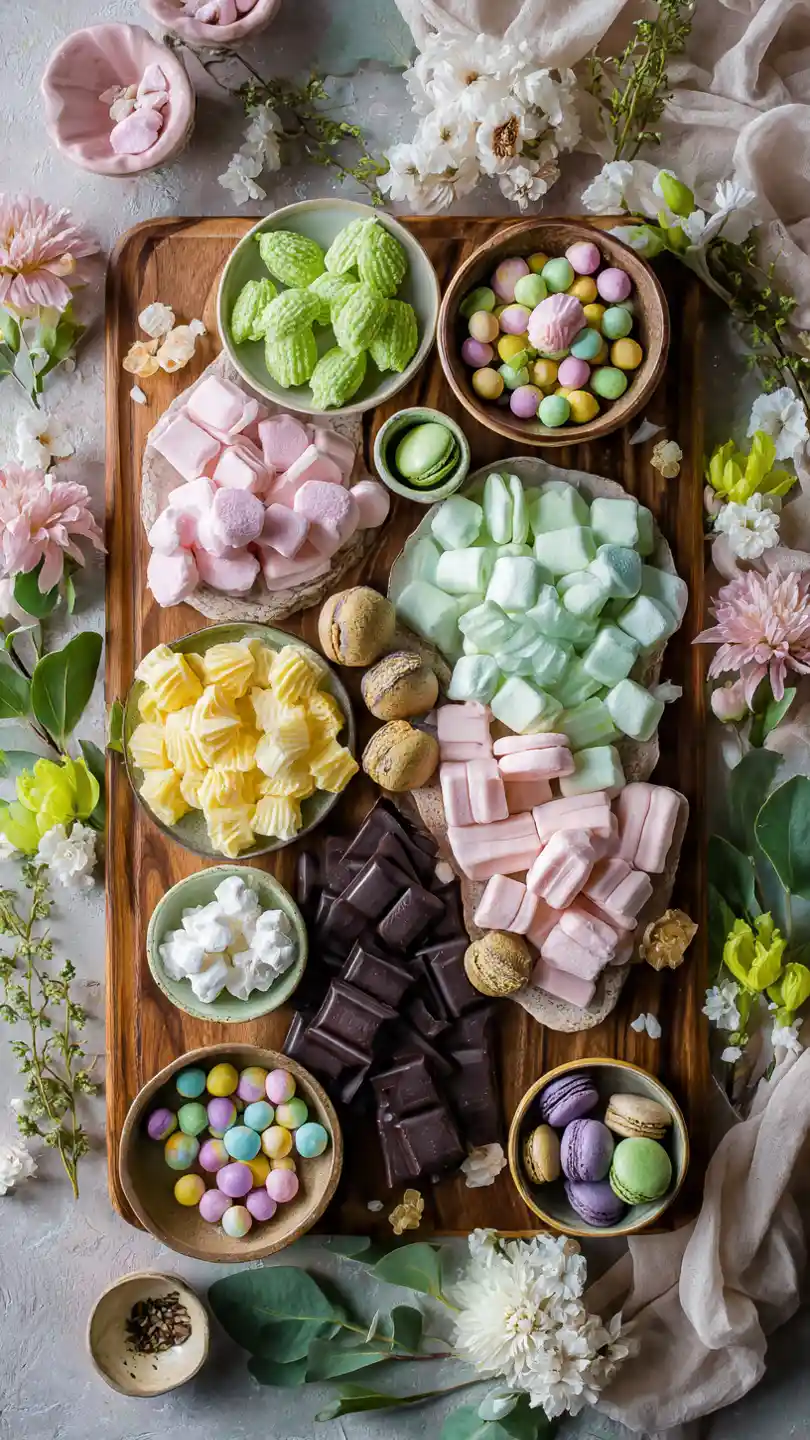
colors and quality ingredients.
Table of Contents
What Is an Easter Candy Charcuterie Board?
Basically? It’s a big wooden or ceramic board filled with candies, chocolates, and treats arranged by color and size. Think of it as the prettier, sweeter cousin of those cheese boards everyone loves.
But here’s what makes it special—you’re being intentional with every piece. The colors matter. The arrangement matters. It feels like you’re creating something, not just dumping snacks on a plate.
These boards work everywhere. Brunches, Easter egg hunts, potlucks, office parties—anywhere you want people to stop and actually notice what you brought. They’re Instagram-beautiful but honestly easy to make, which is a rare combination.
Why a Candy Board Beats a Traditional Easter Basket
Baskets look pretty wrapped up, but the second someone opens it, everything falls apart. Crumpled paper, scattered candy, mess everywhere.
A board stays gorgeous the whole time. Everything’s visible, so people don’t feel weird about taking what they want, and you get a beautiful centerpiece instead of something stuffed in a corner.
Plus—and I love this part—you control exactly what goes on it. With a basket, you’re guessing about how much candy to buy. With a board, you work with what you have and arrange it to look abundant.
Want to make it themed? Go for it. Want to add some st-patricks-day-desserts style elements or combine it with fresh fruit cream cake ideas for something elegant? That flexibility is exactly why an easter candy charcuterie board works better than a one-size-fits-all basket.
What Size Board Do You Actually Need?
For a small family gathering, a 14-16 inch board is perfect. For 8-12 people, go with 18-20 inches. If you’re making this for a bigger party, 24 inches makes people actually stop and stare.
But honestly? Size matters less than how you fill it. I’ve seen small boards that looked absolutely stunning and huge boards that felt empty. What really matters is using the space thoughtfully—no random gaps, but also not so packed that you can’t see what’s actually there.
For your first easter candy charcuterie board, I’d suggest 16-18 inches. It feels impressive but manageable, and you’ll learn what works for your style. After that, you’ll know exactly what size feels right for how you entertain.
Best Easter Candy for Your Charcuterie Board
Now here’s where it gets fun—picking the candy. And honestly, this is where most people get it wrong. They just grab whatever’s on the Easter shelf at the store without thinking about what actually works on a board.
The best easter candy charcuterie board isn’t about having the most expensive candy. It’s about choosing pieces that look good together, taste good, and actually fit your needs. That means picking quality candies with ingredients you feel good about—ones that don’t compromise on that beautiful, Instagram-worthy vibe everyone wants.
Quality Candy Picks That Look Beautiful on the Board
Here’s the thing—a lot of traditional Easter candy has sketchy ingredient lists. Animal-derived gelatin, artificial colors, stuff that just doesn’t feel great. But there are way better options out there that taste amazing and look stunning on a board.
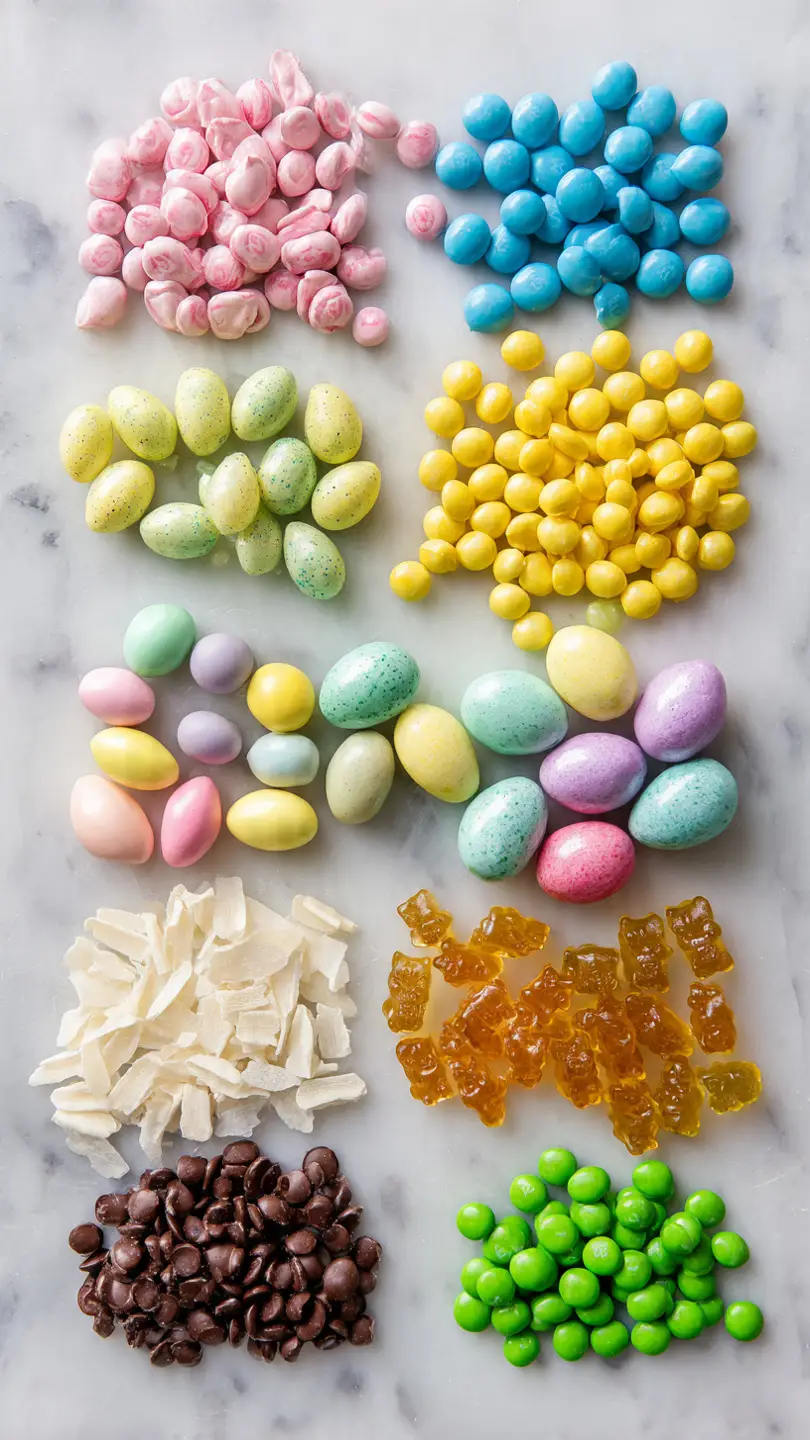
easter candy charcuterie board.
Skittles? Clean ingredients and they come in pastel Easter colors that look absolutely stunning on a board. Starburst candies are gorgeous in pink and yellow. Sour Patch Kids are colorful and fun, especially if you’re making a board that kids will get excited about.
For the chocolate lovers, look for quality chocolate eggs in beautiful foil wrapping—they add that elegant touch. Gummy candies like Haribo have versions with better gelatin sources. Jolly Ranchers give you those beautiful jewel tones that fill gaps perfectly.
My absolute favorite trick? Coconut macaroons. They’re naturally elegant, they’re made with simple ingredients, and they add this sophisticated touch that makes the whole board feel more intentional. M&Ms (plain varieties) are also great—you can find pastel Easter colors, and they’re perfect for filling space.
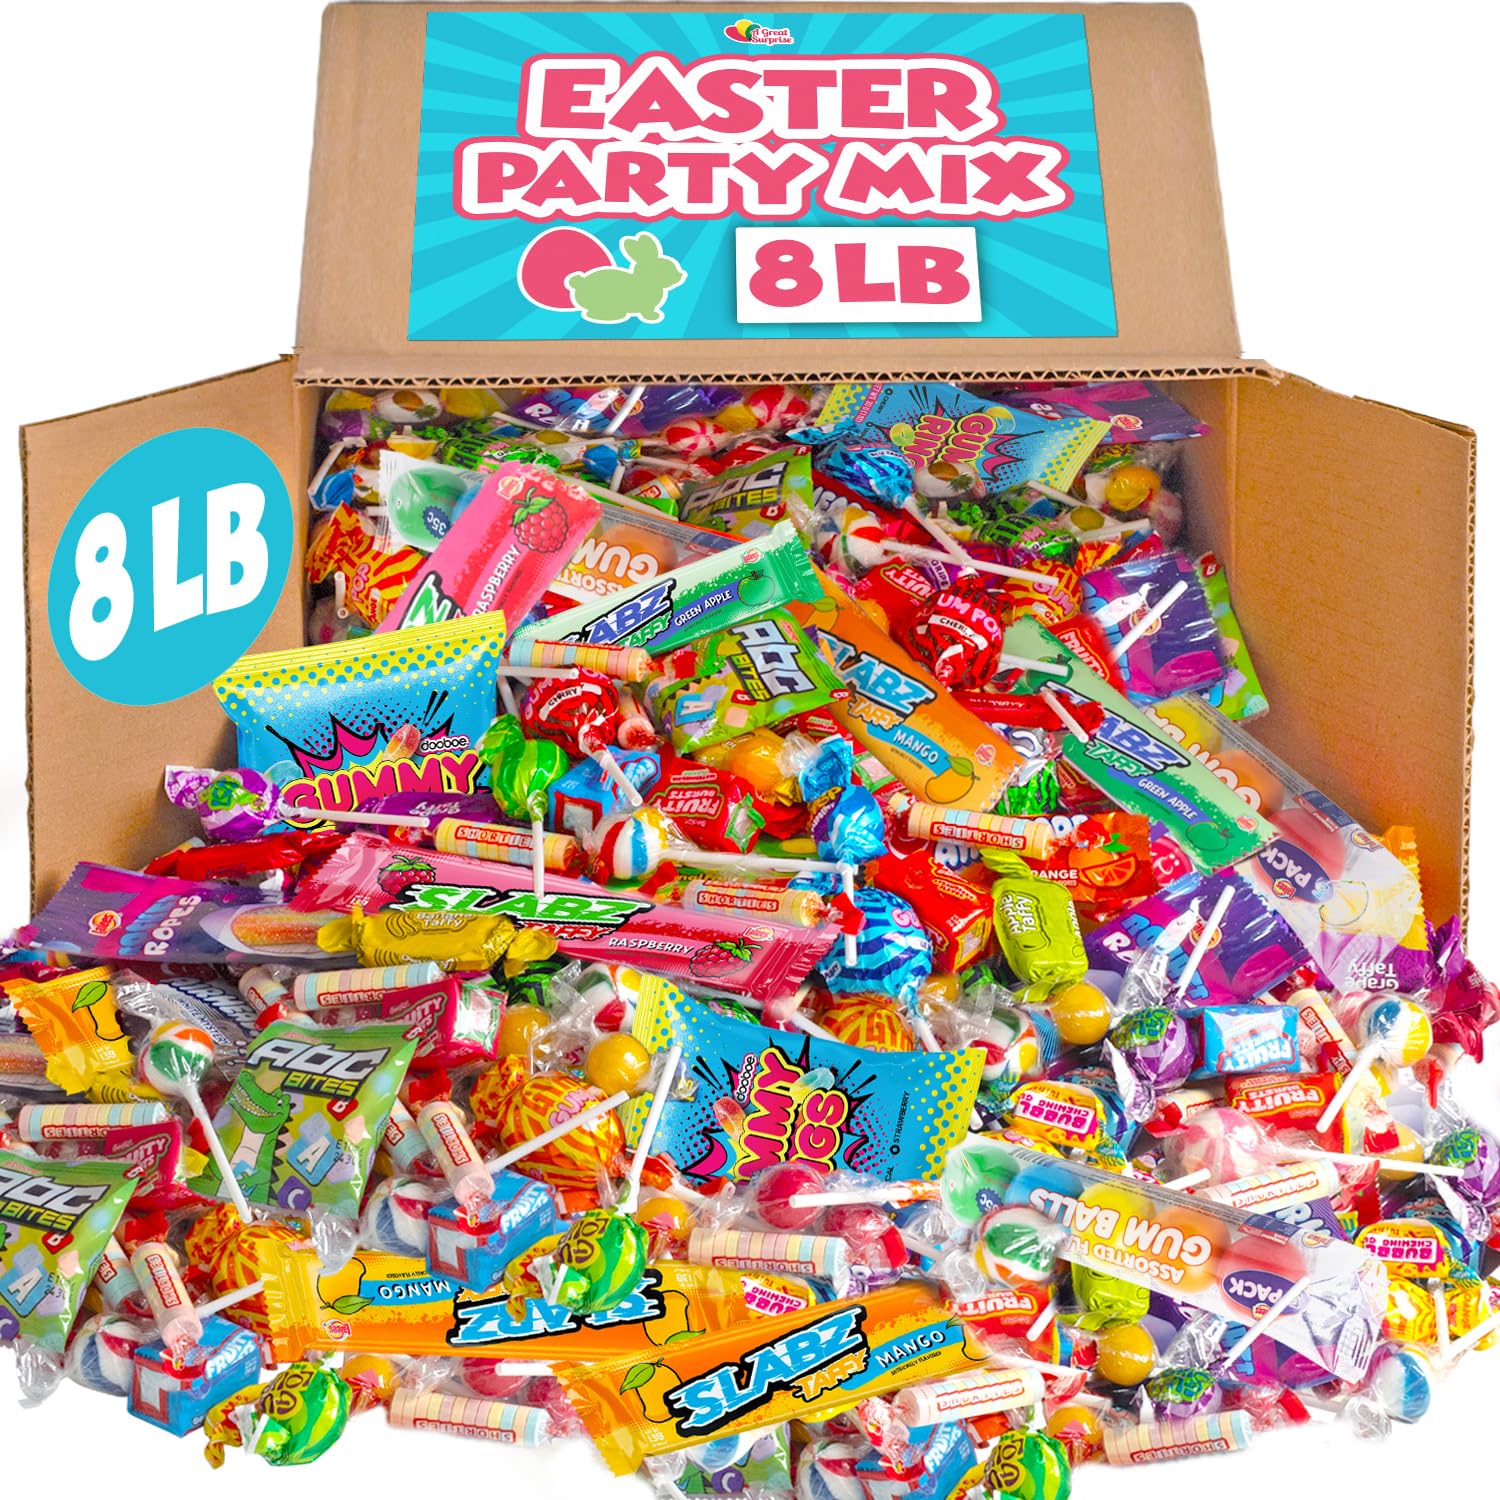
Easter Candy Mix Variety Pack
A curated selection of colorful candies perfect for building your easter candy charcuterie board with quality ingredient options.
View on Amazon →The difference between a good board and a stunning board? You’re intentional about what you’re buying. Check the ingredient labels. Look for options without artificial dyes if that matters to you. Your guests will notice that you actually cared about quality.
How to Choose Candy by Color — Not Just Flavor
This is honestly the secret sauce. Most people think about taste first, but when you’re building an easter candy charcuterie board, color is everything.
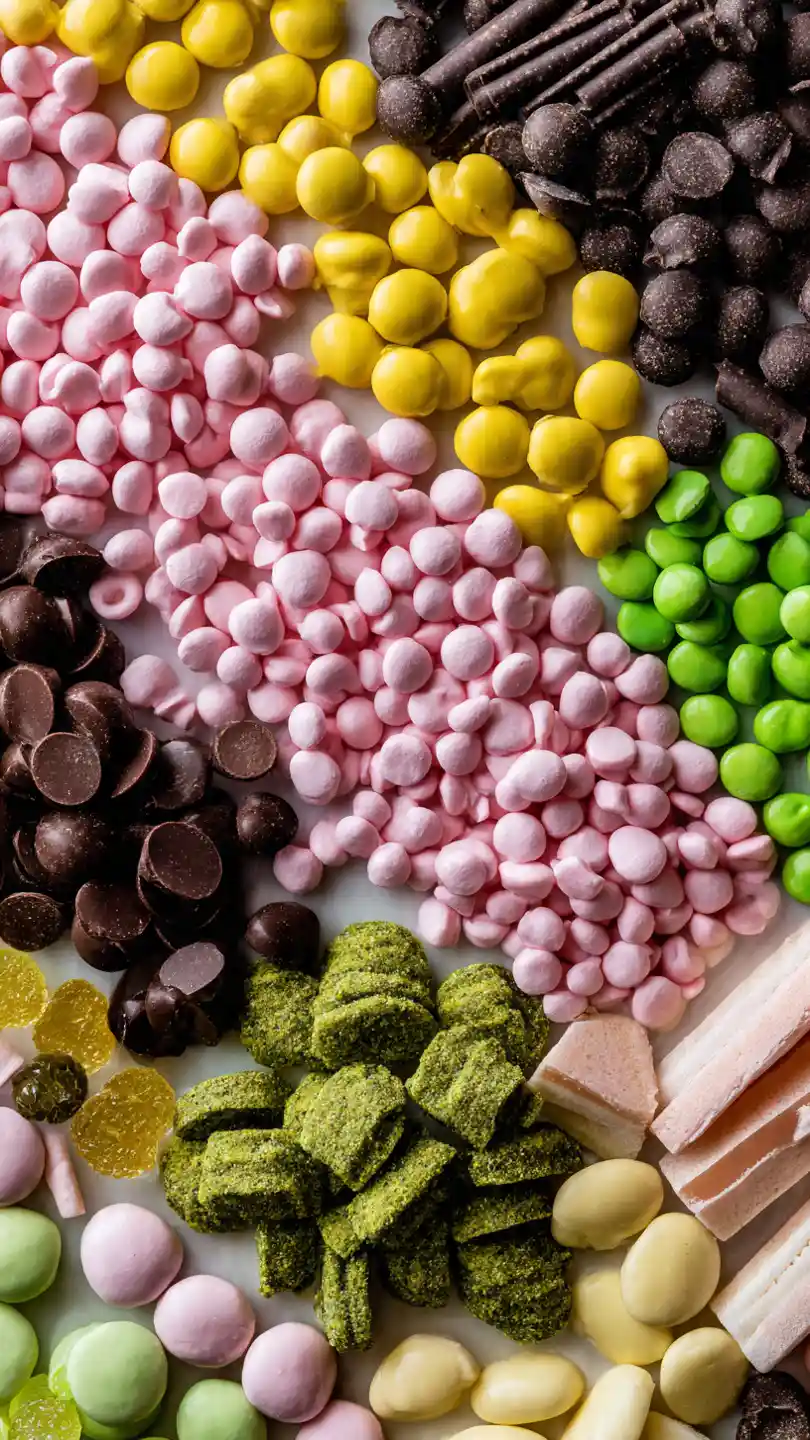
grouped by color for a stunning visual impact.
Start by choosing a color palette. Think pastels if you want that soft, elegant Easter vibe. Think brights if you’re going for something more playful and fun. I usually do a mix—soft pastels as the base, then pops of color with the brighter candies.
Pastels work great in spring: light pink, pale yellow, soft green, gentle blue, white, cream. These colors make people smile the moment they see the board. Bright colors—hot pink, vibrant yellow, bold orange—work if you’re doing a party for kids or want something more energetic.
Here’s how I build it: I pick 3-4 main colors, then choose candies that fit those colors. If I’m going with a “soft spring” palette, I’ll use light pink Starbursts, pale yellow candies, soft green gummies. If I’m doing something bolder, I’ll load it with hot pink, bright yellow, and vibrant colors.
The chocolate and brown candies? Those are your anchors. They break up the bright colors and add sophistication. Chocolate eggs, dark gummies, those coconut macaroons—they’re what make it look intentional instead of just chaotic.
Don’t stress about perfection. The goal is colors that make you happy and feel like spring. If you love those colors clustered together, that’s the right choice for your board.

Small Glass Bowls Set
Perfect for grouping candies by color before arranging them on your board. Makes the easter candy charcuterie board assembly process so much easier.
View on Amazon →Color theory might sound fancy, but it’s really just about stepping back, looking at what you’ve arranged, and asking yourself, “Does this feel good to me?” If it does, you’ve nailed it. And that’s what makes an easter candy charcuterie board actually beautiful—it’s personal.
How to Build Your Easter Candy Charcuterie Board Step by Step
Okay, this is the fun part. Building the board is actually way simpler than it looks, and honestly, there’s no way to really mess it up. But I’ve learned a few tricks that make the difference between a good board and one that looks like you spent hours on it.
The key is starting with a strategy instead of just dumping candy randomly. I promise you’ll see the difference the moment you step back and look at your easter candy charcuterie board. Let me walk you through exactly how I do it.
Step 1 — Anchor Your Board With Bowls and Large Items
Before you place a single piece of candy, think about the structure. I always start by placing 3-4 small bowls around the board—these become your anchors. They give your eyes a place to land and break up the flatness of all the loose candy.
Fill these bowls with your biggest or most beautiful candies. Maybe chocolate eggs go in one bowl, coconut macaroons in another, fancy chocolate truffles in a third. This creates visual interest and makes the whole board feel more intentional than if everything was just scattered.
For an 18-inch board, I place one bowl in the upper left, one in the lower right, maybe one in the center. The positions don’t have to be perfect—just spread them out so your eye travels around the whole board when you look at it.

Bamboo Charcuterie Board With Handles
The perfect foundation for your easter candy charcuterie board. This board has beautiful handles for easy carrying to parties.
View on Amazon →Next, add your larger individual items around those bowls. Chocolate eggs, lollipops, macaroons, anything that stands out visually. These fill the bigger spaces and prevent gaps. Think of them as your foundation—everything else builds on top of this.
Step 2 — Fill, Layer, and Style Like a Pro
Now comes the layering. This is where an easter candy charcuterie board goes from okay to stunning. I grab handfuls of smaller candies and start grouping them by color around those anchors.
Start with one color family. Grab all your pink candies—Starbursts, pink Skittles, pink gummies. Create a little cluster. Then move to your next color. Yellow candies go next to the pink. Add some greens. Don’t overthink it—let the colors flow naturally around the board.
Here’s my secret: leave almost no empty space, but don’t crowd it so much that it feels chaotic. If you see a gap, fill it. But if something feels like it’s touching too much other stuff, move it slightly. You’re looking for that sweet spot between “fully loaded” and “breathing room.”
The chocolate and brown candies are your best friends here. When the board feels too bright or chaotic, a handful of dark chocolate candies break it up. They act like punctuation marks in a sentence—they give your eye a place to rest.
Step back and look at your work. Does one area feel heavier than another? Move some candy around. Does the color flow feel good? If it makes you smile, you’re done. This is honestly the whole secret—there’s no “right” way. Your board is right if it feels right to you.
I usually take a photo from above before people start eating. It’s fun to see how the board looked before the chaos, and honestly, these photos are perfect for sharing. If you’re bringing this to a dessert celebration or pairing it with other treats, the photo helps people visualize what you brought.
One more tip: arrange everything about 2-3 hours before people arrive. This keeps things fresh but gives you time to make small adjustments if something doesn’t look quite right. Candy doesn’t dry out or get weird in that timeframe, and your board stays picture-perfect when guests arrive.
The Toothpick Trick
If you have taller candies that keep falling over, use small toothpicks or pretzel sticks to prop them up. Lollipops especially benefit from this. Just stick them in at an angle so they stay put while people are grabbing candy.
Easter Candy Board Themes and Variations
Here’s what I love about making these boards—you can customize them for literally any situation. The basic formula stays the same, but the execution changes based on who you’re entertaining and what your vibe is that year.
Easter Board for Kids vs Adults
The difference between a kids’ board and an adults’ board is mostly about fun factor versus sophistication. For kids, I go bright, bold, and playful. Think hot pink, neon yellow, vibrant colors. I add more gummy candies, Sour Patch Kids, colorful lollipops—stuff that makes them excited.
The bowl strategy changes too. Instead of three bowls, I might do five smaller bowls so kids feel like they have lots of options. It’s less about elegant arrangement and more about “wow, look at all these choices!” I also make sure taller candies are secured (remember that toothpick trick?) because kids will grab things enthusiastically.
For adults, I shift toward elegance. Soft pastels, chocolate eggs, coconut macaroons, fancy Starbursts. I add more of the anchor items and fewer of the loose candies. The color palette is curated—light pink, soft yellow, cream, maybe one pop of deeper color. It feels intentional and sophisticated.
The interesting part? You can make both with basically the same candies. The difference is how you arrange them and what you emphasize. One board celebrates chaos and fun. The other celebrates restraint and beauty.
Budget Board Under $20 vs Showstopper Board
Not every easter candy charcuterie board needs to cost a fortune. I’ve made beautiful ones for $15-20 by being strategic about what I buy and where.
For a budget board, skip the fancy chocolate eggs and focus on classic candies. Skittles, Starburst, Sour Patch Kids, regular gummy bears—all affordable and colorful. Buy the store-brand chocolate pieces instead of premium brands. Shop at discount candy stores if you have them locally.
The secret to making it look expensive when it’s not? Use that color theory we talked about. A thoughtfully arranged board with budget candies looks better than a randomly thrown together board with fancy chocolate. Spend your time on arrangement, not on fancy products.
For a showstopper board, go all in. Premium chocolate eggs from fancy brands, artisan gummies, fancy macaroons, maybe add some edible flowers or gold leaf touches. This board might run $40-60, but honestly, the presentation is what costs the money more than the actual candy.
Whether you’re spending $15 or $50, the easter candy charcuterie board formula is the same. Structure with anchors. Group by color. Step back and adjust. The budget version might have $2 lollipops instead of $10 ones, but the concept is identical.
I usually make a budget version for my office potluck and a fancier version for my family gathering. Both get compliments. Both disappear quickly. Both make people happy. That’s what actually matters.
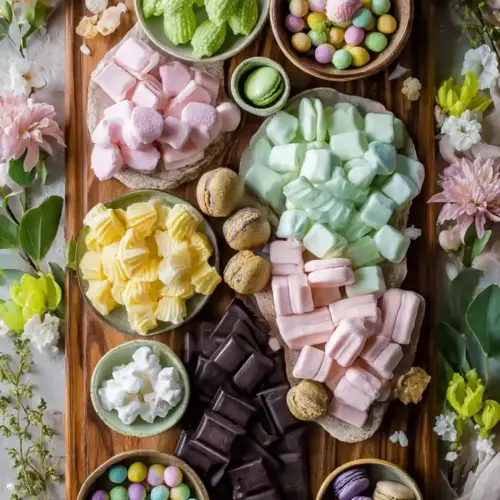
Easter Candy Charcuterie Board

Equipment
- Wooden or ceramic charcuterie board (16-18 inches)
- Small ceramic bowls (3-4 pieces)
- Toothpicks or pretzel sticks (for tall candies)
- Parchment paper (optional)
Ingredients
Quality Easter Candies
- 1-2 lbs Skittles (pastel colors) or other small colorful candies
- 1 lb Starburst candies (pink and yellow) or Jolly Ranchers for jewel tones
- 0.5 lb Sour Patch Kids or gummy bears (halal-certified if preferred)
- 12-16 Chocolate eggs (foil-wrapped) quality brand recommended
- 1 lb Coconut macaroons or chocolate truffles
- 0.5 lb Plain M&Ms (pastel Easter colors) for filling gaps
- optional Lollipops, gummy worms, or specialty Easter candies for height and variety
Decorative Elements (Optional)
- handful Fresh spring flowers (pastel colors) optional for decoration
- sprinkle Decorative leaves or greenery optional for spring aesthetic
Instructions
- Choose your board size: 14-16 inches for small gatherings, 18-20 inches for 8-12 people, or 24 inches for large parties. For beginners, 16-18 inches is ideal—impressive but manageable.
- Gather and sort all your candies by color. Place them in small bags or bowls organized by hue—pinks together, yellows, greens, whites, and browns separate. This makes assembly much faster.
- If using a wooden board, chill it in the refrigerator for 30 minutes before assembly. This prevents chocolate from melting too quickly when candies are placed on it.
- Optionally, line the board lightly with parchment paper to prevent sticky candy residue from staining the wood. This protects your board for reuse.
- ANCHOR STEP: Place 3-4 small ceramic bowls strategically around the board—one in the upper left, one in the lower right, one in the center. These bowls are your ‘anchors’ that structure the entire board.
- Fill each bowl with your largest or most beautiful candies: chocolate eggs in one bowl, coconut macaroons in another, fancy chocolate truffles in a third. This creates visual interest and intentional design.
- Around those bowls, place larger individual candy items: chocolate eggs, lollipops, and macaroons to fill bigger spaces and prevent gaps. These act as your foundation.
- COLOR GROUPING: Start with one color family. Grab all your pink candies (Starbursts, pink Skittles, pink gummies) and create a cluster. Move to yellow candies next, then greens. Let colors flow naturally—don’t overthink it.
- Fill gaps with smaller candies, ensuring almost no empty space. However, don’t overcrowd so much that it feels chaotic. You want ‘fully loaded’ but still able to see the board underneath.
- Use chocolate and brown candies as ‘punctuation marks’ to break up bright colors and rest your eye. They add sophistication and balance to the design.
- Step back and view your work from above. Does color flow feel balanced? Does one area feel heavier than another? Adjust candies as needed until it makes you happy.
- PRO TIP – Toothpick Trick: If tall candies like lollipops keep falling over, secure them with small toothpicks or pretzel sticks at an angle so they stay put while guests grab candies.
- Take a photo of your finished board from above before guests start eating. This captures the beauty before the chaos and creates a shareable image for social media.
- For parties: Arrange the board 2-3 hours before guests arrive. This keeps candy fresh and gives you time to adjust if something doesn’t look quite right.
- Present your easter candy charcuterie board as the centerpiece of your table or event. Watch as guests naturally gather around it, creating those memorable moments of sharing and joy.
Notes
Pro Tips for Success:
Prep the night before: Sort candies by color and bag them. Assembly takes just 15 minutes on party day. Budget vs. Showstopper: Budget boards ($15-20) use classic affordable candies with thoughtful arrangement. Showstopper boards ($40-60) feature premium chocolate, artisan gummies, and edible flowers. The formula is identical—presentation matters more than price. Kids vs. Adults: Kids’ boards use bright neon colors, more bowl options, and playful candies. Adult boards feature soft pastels, sophisticated chocolate, and elegant arrangement. Same candies, different execution. Candy Quality: Check ingredient labels. Look for candies without artificial dyes if that matters to you. Guests notice when you care about what goes on the board. Fresh Touches: Scatter pastel flowers or decorative leaves between candy clusters for extra spring vibes and visual appeal.FAQs
How do you make an Easter candy charcuterie board?
Start by choosing your board size (16-18 inches is perfect for beginners). Place 3-4 small bowls around the board as anchors, filling them with your largest or most beautiful candies. Then group smaller candies by color around those bowls, creating clusters of similar hues. Fill gaps strategically, step back to check balance, and adjust as needed. The whole process takes 10-15 minutes once your candies are sorted. Don’t stress about perfection—if it makes you happy, you’re done.
What candy goes on an Easter board?
The best candies for an easter candy charcuterie board are ones with vibrant colors and quality ingredients. Skittles, Starburst, Sour Patch Kids, Jolly Ranchers, and plain M&Ms in pastel colors work beautifully. Add chocolate eggs, chocolate candies, gummy bears, and coconut macaroons for variety. Choose candies with ingredients you feel good about—read labels and look for options without artificial dyes if that matters to you. The key is picking pieces that look good together as much as taste good together.
How do you make an Easter charcuterie board for kids?
Kids’ boards are all about bright, fun colors and lots of options. Use hot pink, neon yellow, vibrant orange, and bold colors instead of pastels. Include fun candies like Sour Patch Kids, colorful gummies, lollipops, and rainbow candies. Use more bowls (five instead of three) so it feels like there’s tons to choose from. Make sure taller candies are secured with toothpicks so they don’t fall over when kids grab them. Skip the sophisticated arrangement—aim for exciting and chaotic instead. Kids care less about color theory and more about choice and fun.
What are the best quality candy options for an Easter board?
Look for candies with clean ingredient lists and minimal artificial additives. Skittles and Starburst have cleaner ingredient profiles than some alternatives. Gummy candies like Haribo come in versions with better gelatin sources. Check labels for artificial dyes and choose options without them if you prefer. Coconut macaroons and chocolate eggs from quality brands add sophistication. Honestly, most mainstream Easter candies work fine—the difference is taking time to read ingredients and making intentional choices rather than grabbing whatever’s cheapest. Your guests notice when you actually cared about what went on the board.
Final Thoughts
Building an easter candy charcuterie board has become one of my favorite ways to show people I care. It’s not complicated or fancy or expensive. It’s just thoughtful arrangement of colors and flavors that makes people smile the moment they see it.
What started as Olivia walking in with that gorgeous board has turned into something I make year after year. My friends ask me to bring one to their parties. My family waits to see what I’ll come up with. And honestly? The joy of watching people gather around something you created is worth every minute.
Start simple. Grab a 16-18 inch board. Pick candies that make you happy. Arrange them by color. Step back. Adjust. That’s it. You’ve got this, and I promise your guests will be genuinely impressed.
The most beautiful thing about an easter candy charcuterie board isn’t the candy or the arrangement—it’s the moment when everyone stops what they’re doing and gathers around it. That’s the magic you’re actually creating.
Pro Tips for Easter Entertaining
- Prep the night before: Sort your candies by color and bag them. Assembly takes just 15 minutes on party day.
- Chill your board: If you’re using a wooden board, pop it in the fridge for 30 minutes before arranging candy. It keeps chocolate from melting too quickly.
- Use parchment paper: Line the board lightly with parchment to prevent sticky candy residue from staining the wood.
- Add fresh touches: Scatter fresh pastel flowers or add decorative leaves between candy clusters for extra spring vibes.
More Recipes You May Like
If you loved this easter candy charcuterie board, you’ll probably enjoy these other celebration-worthy recipes from RecipesChrono:

Ummmy